about bad renovations - all the bad renovations - latest bad updates - bad feedback - good people

our bad renovations:

Move in Condition
Master Bedroom
The Den
Half Bath (Downstairs)
Pointed Arch Destruction
Garage / Workshop
Hallway Facelift
New Windows
Load Bearing Beam
Kitchen Renovation Part 1
Kitchen Renovation Part 2
Dining Room
Basement
Pool Renovation
Dining Room Table
Formal Living Room
Nursery
Electrical Rewiring
Bedrooms
Air Conditioning / Heat Pumps
Front Porch
Outdoor Living
Landscaping


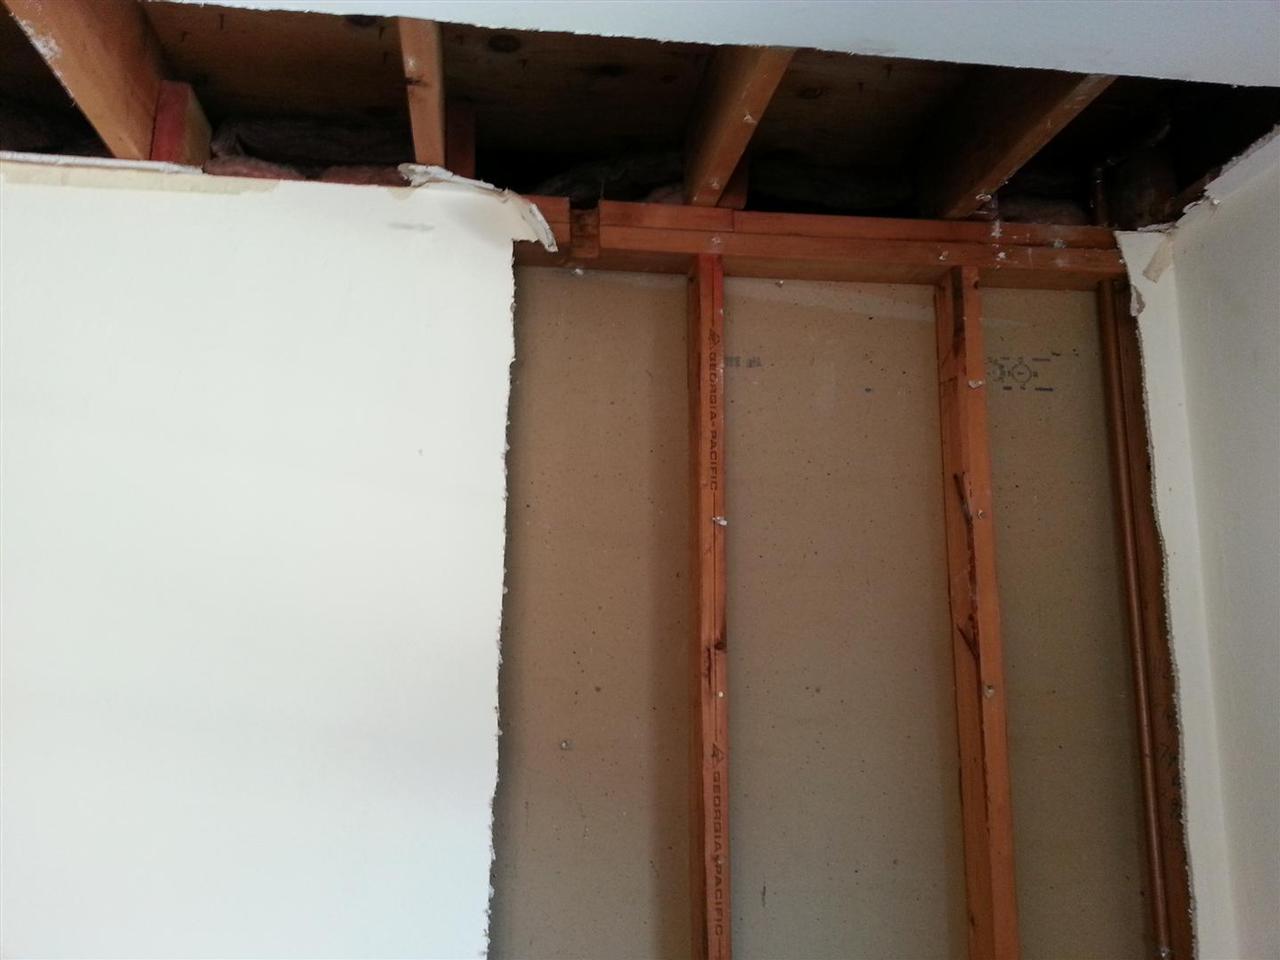
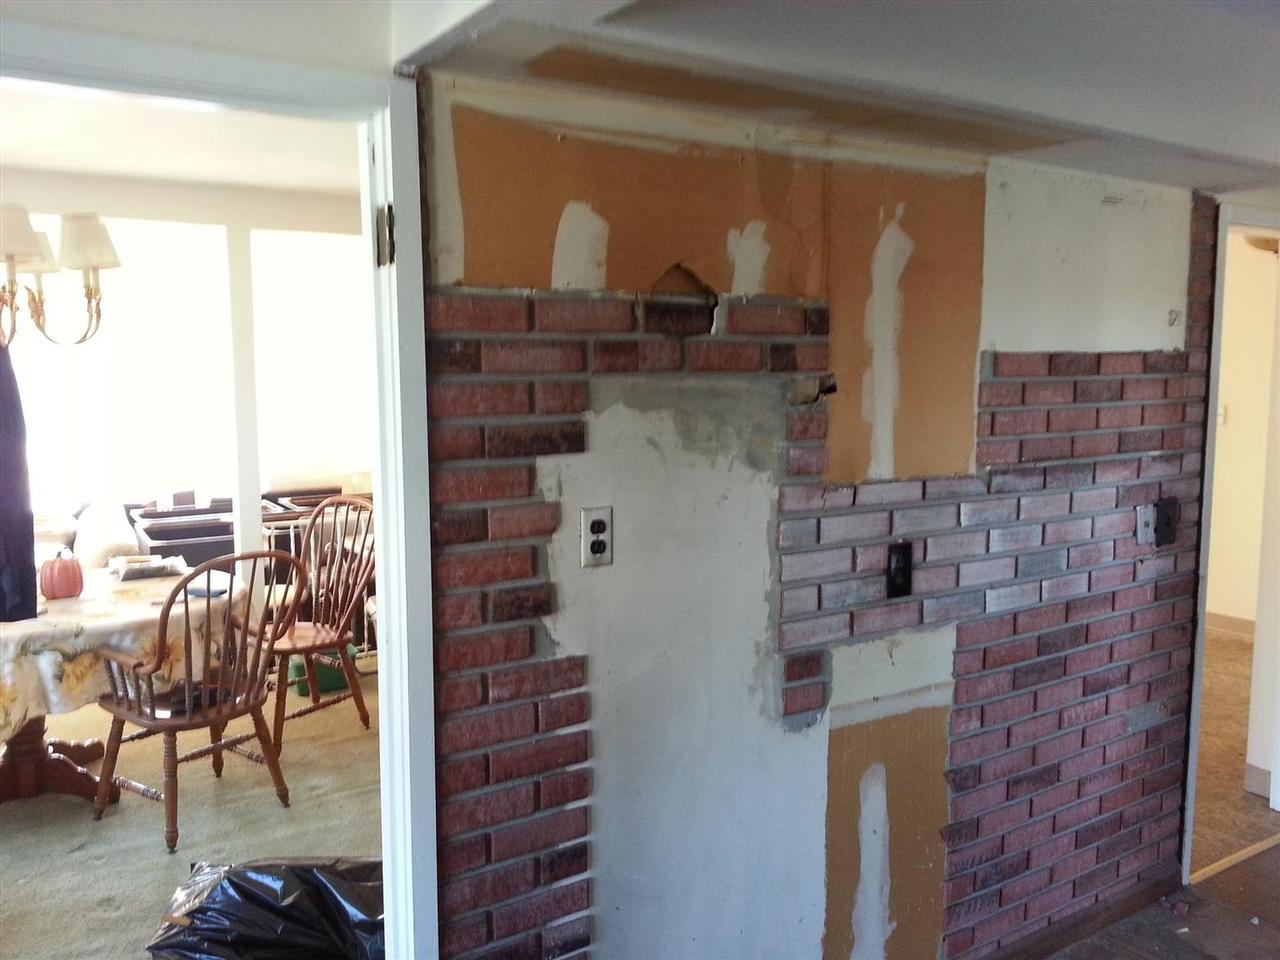
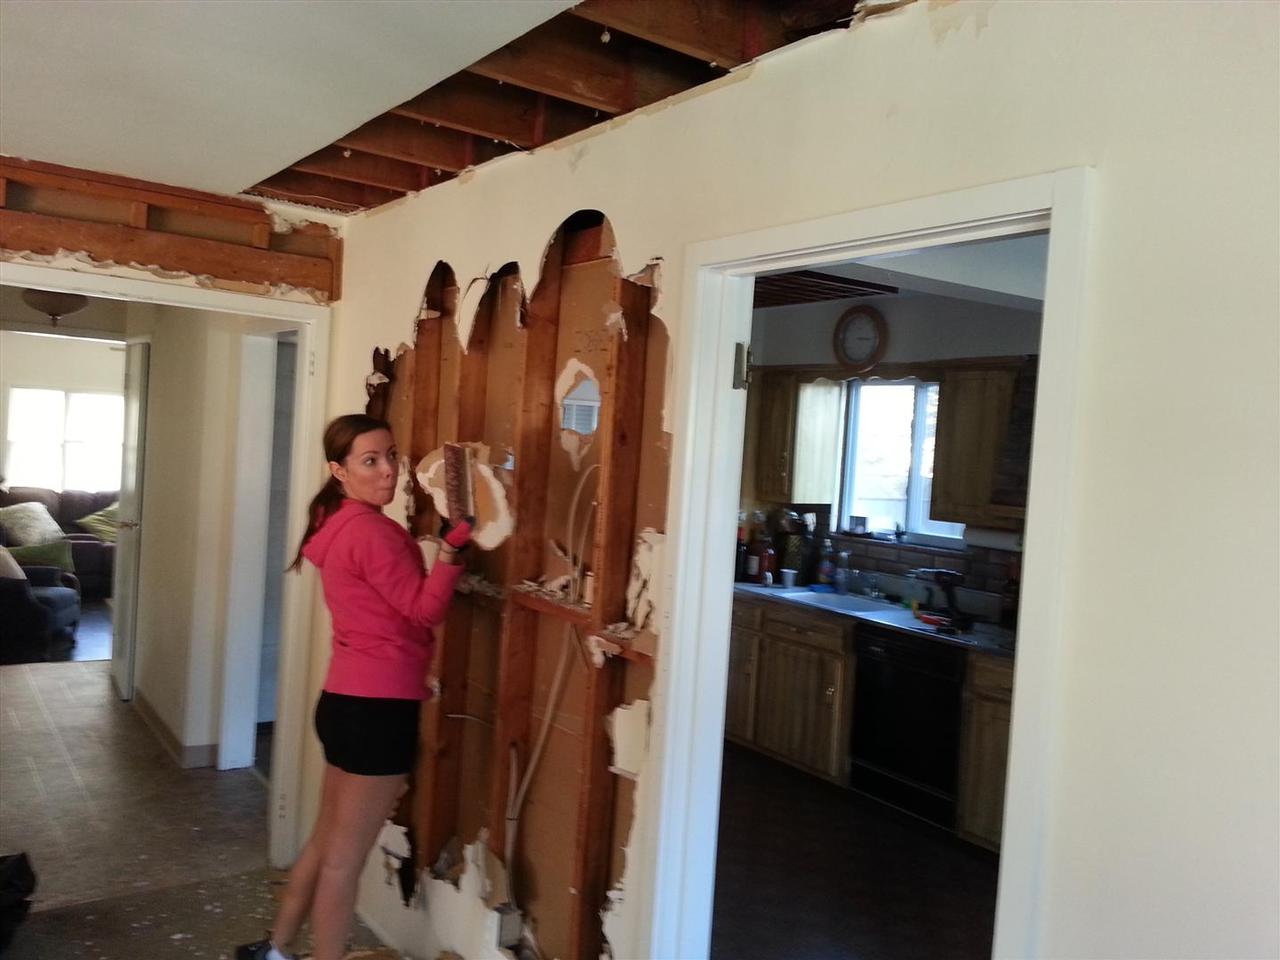
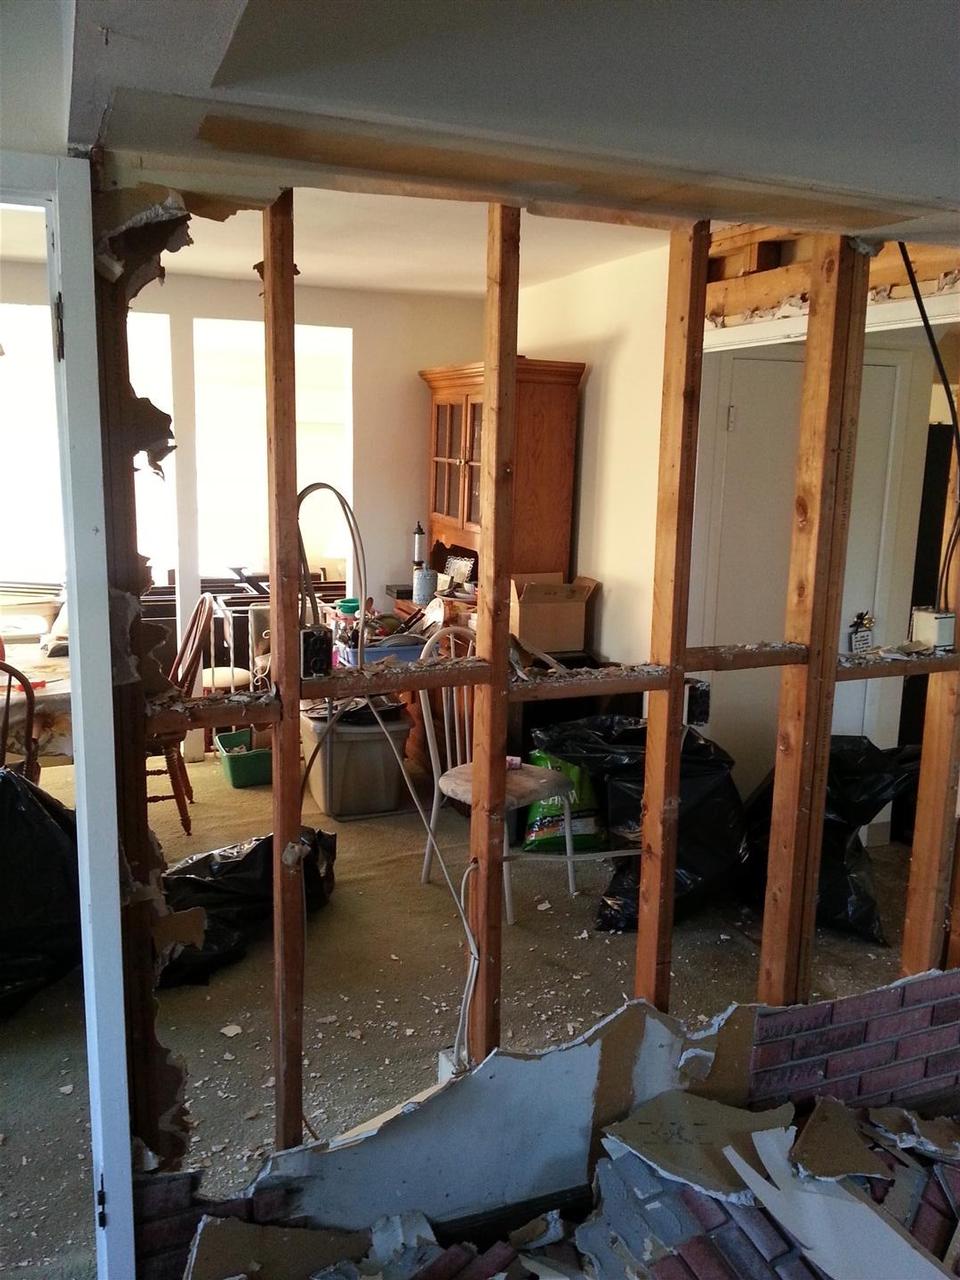
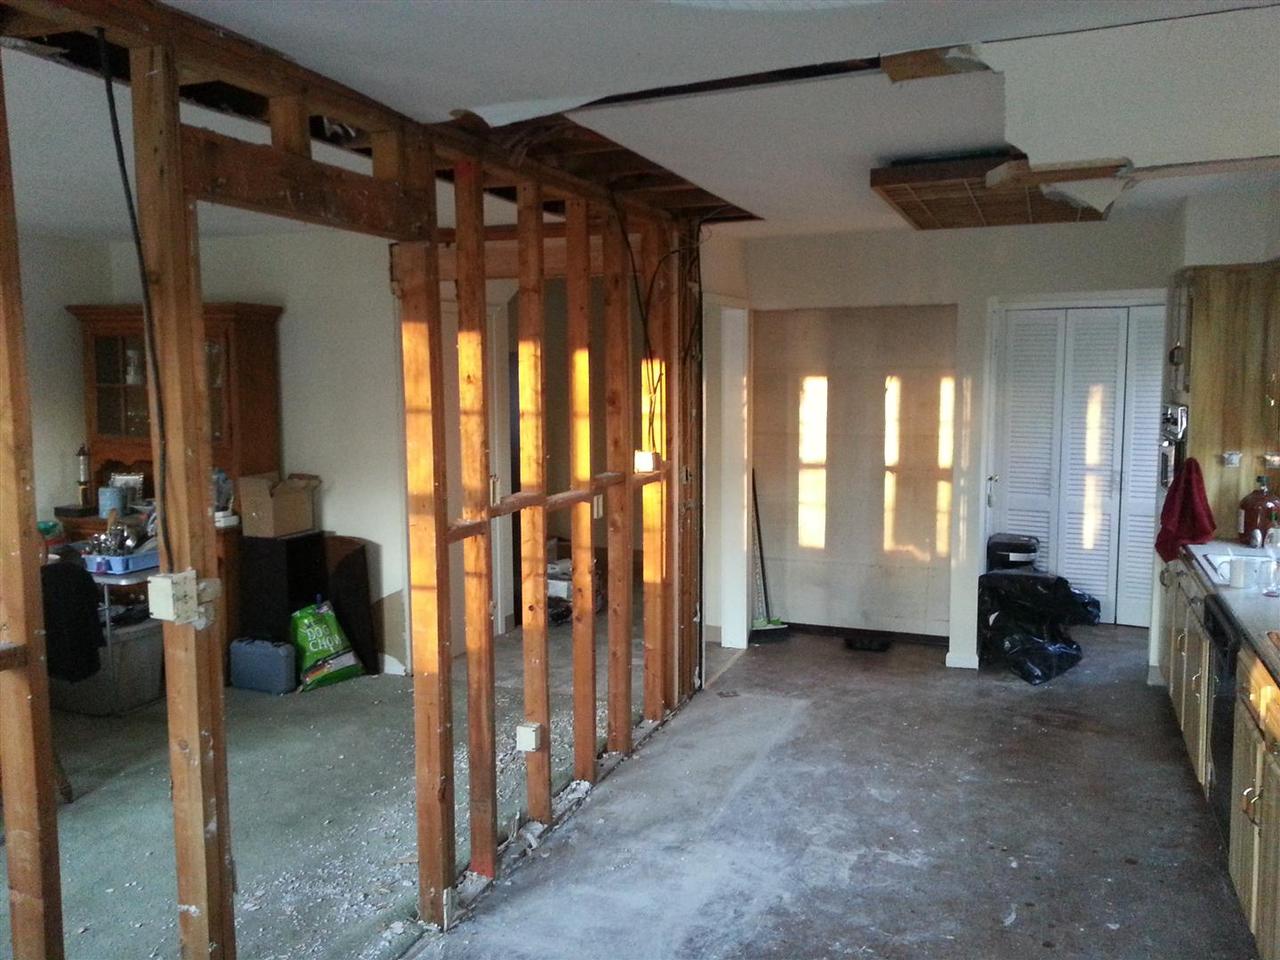
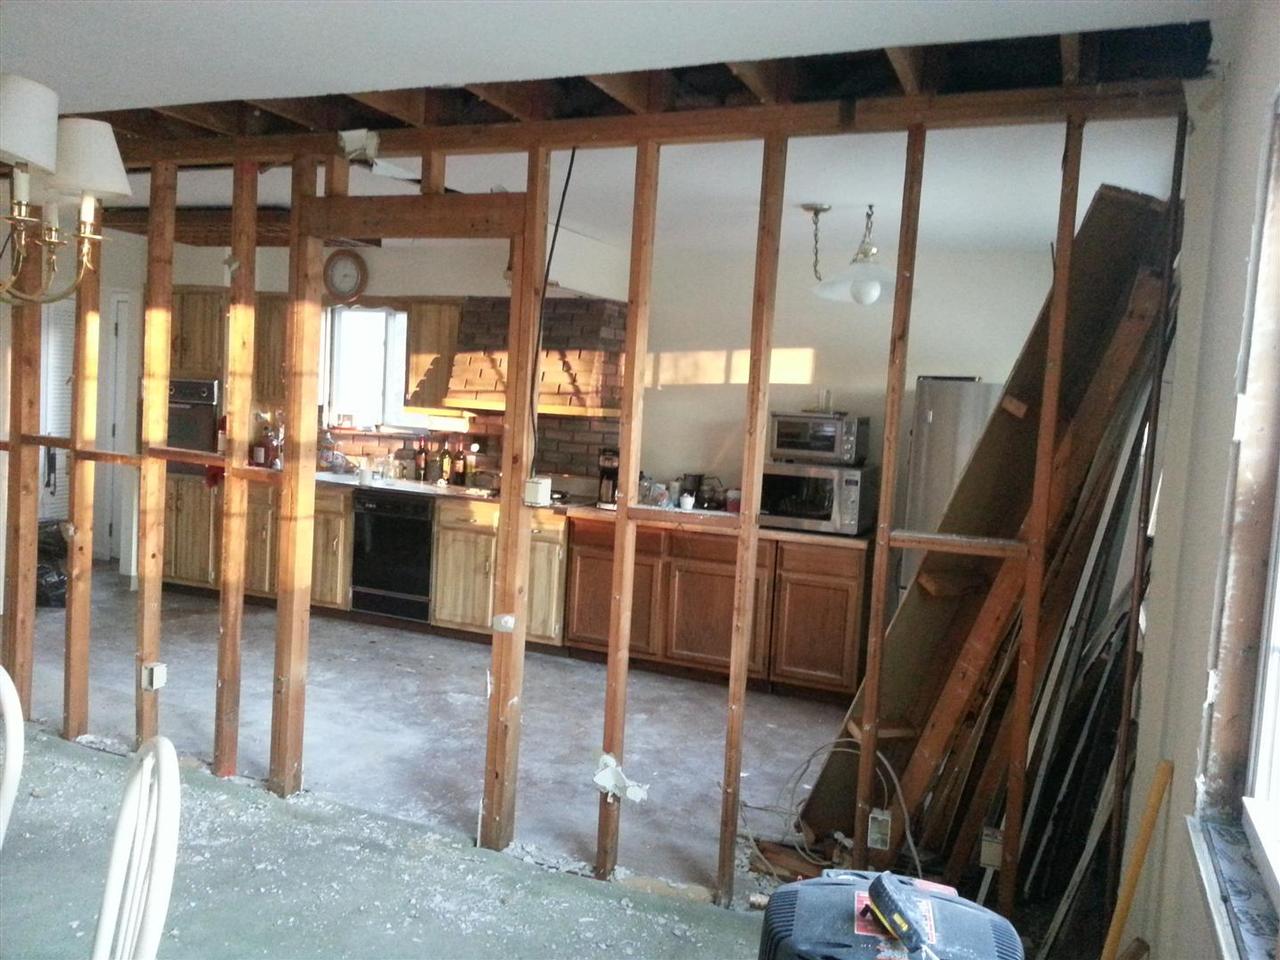
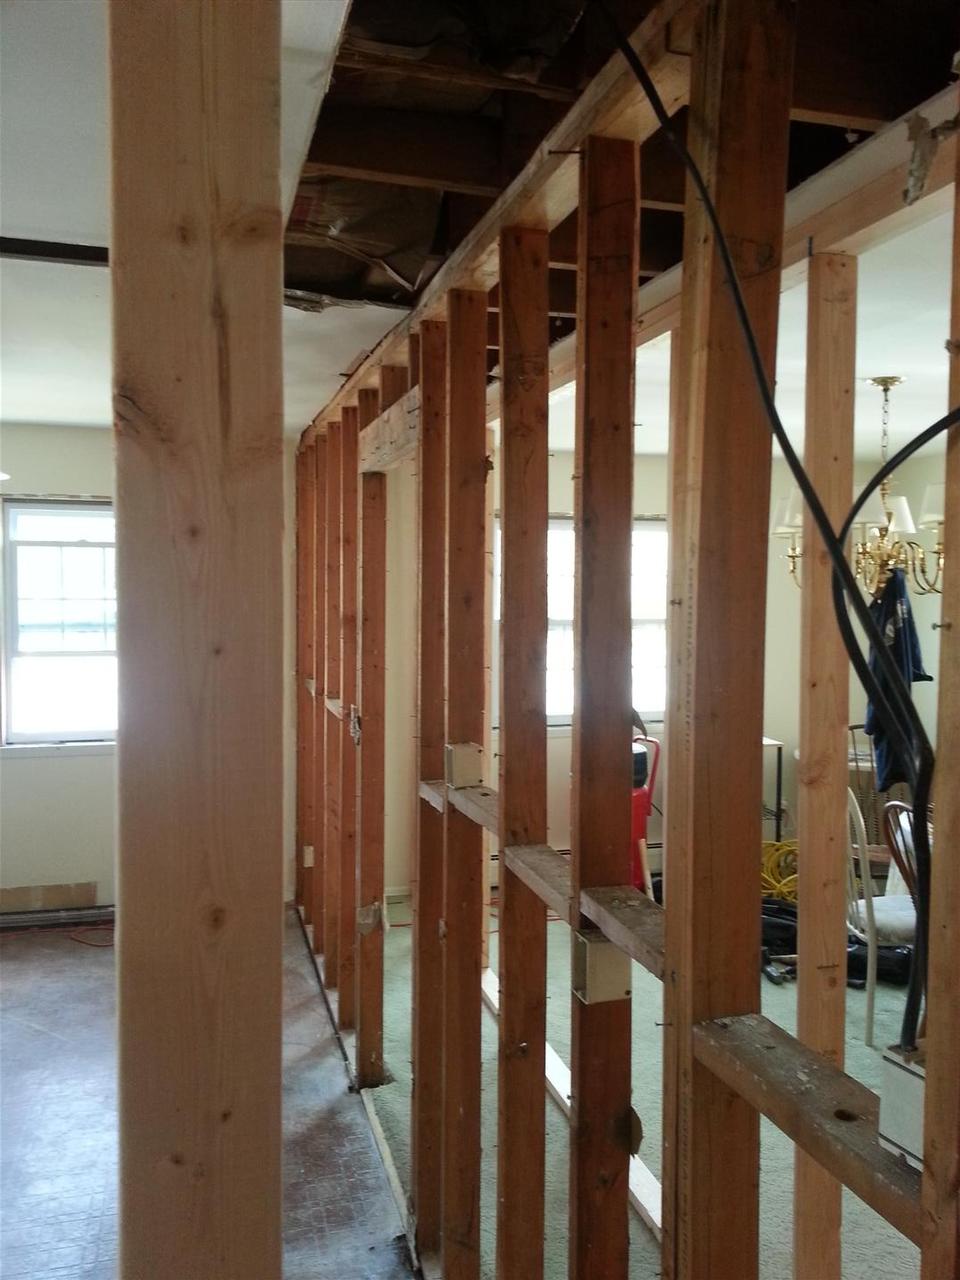
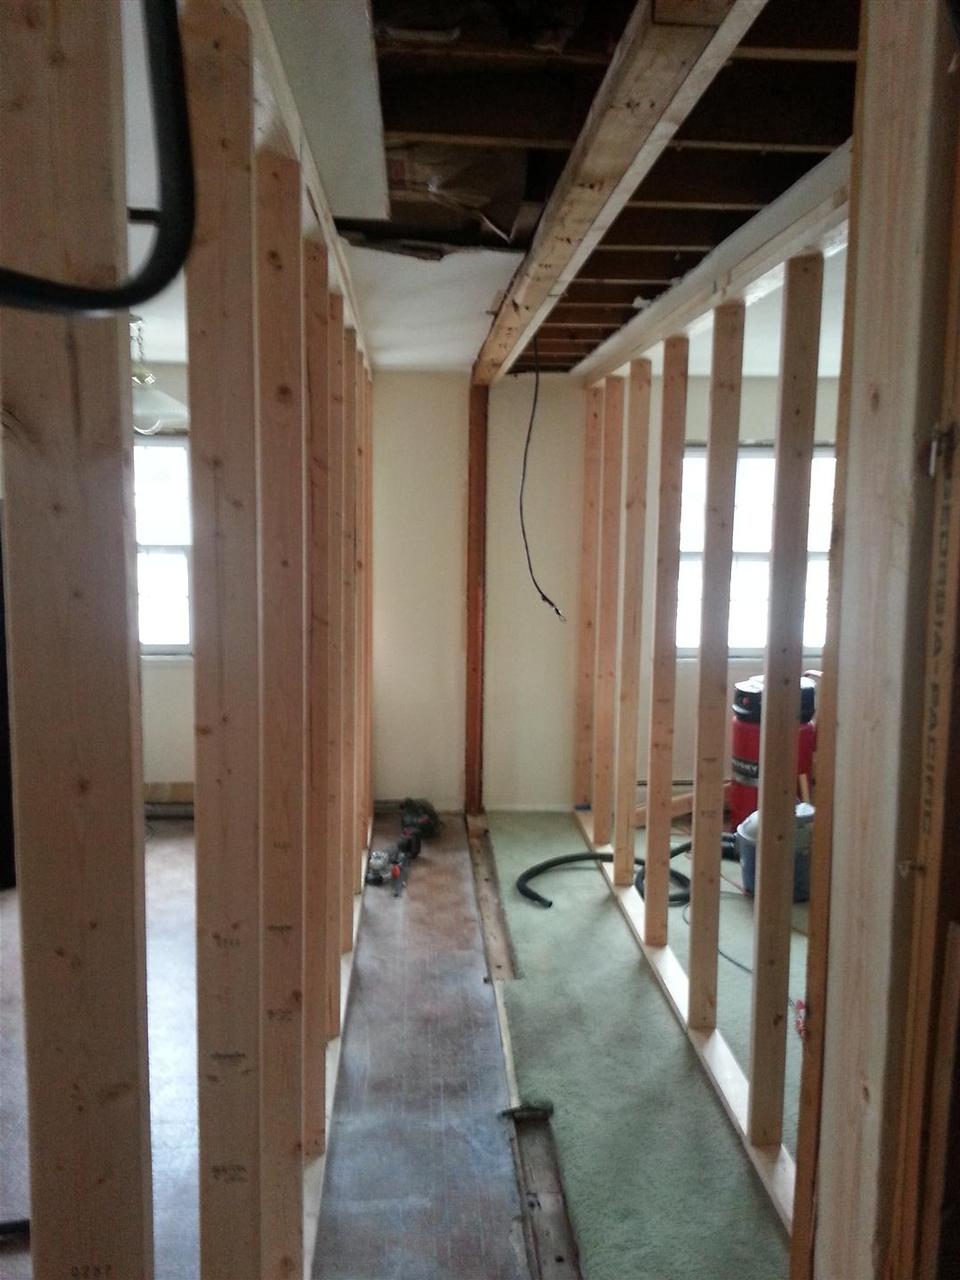
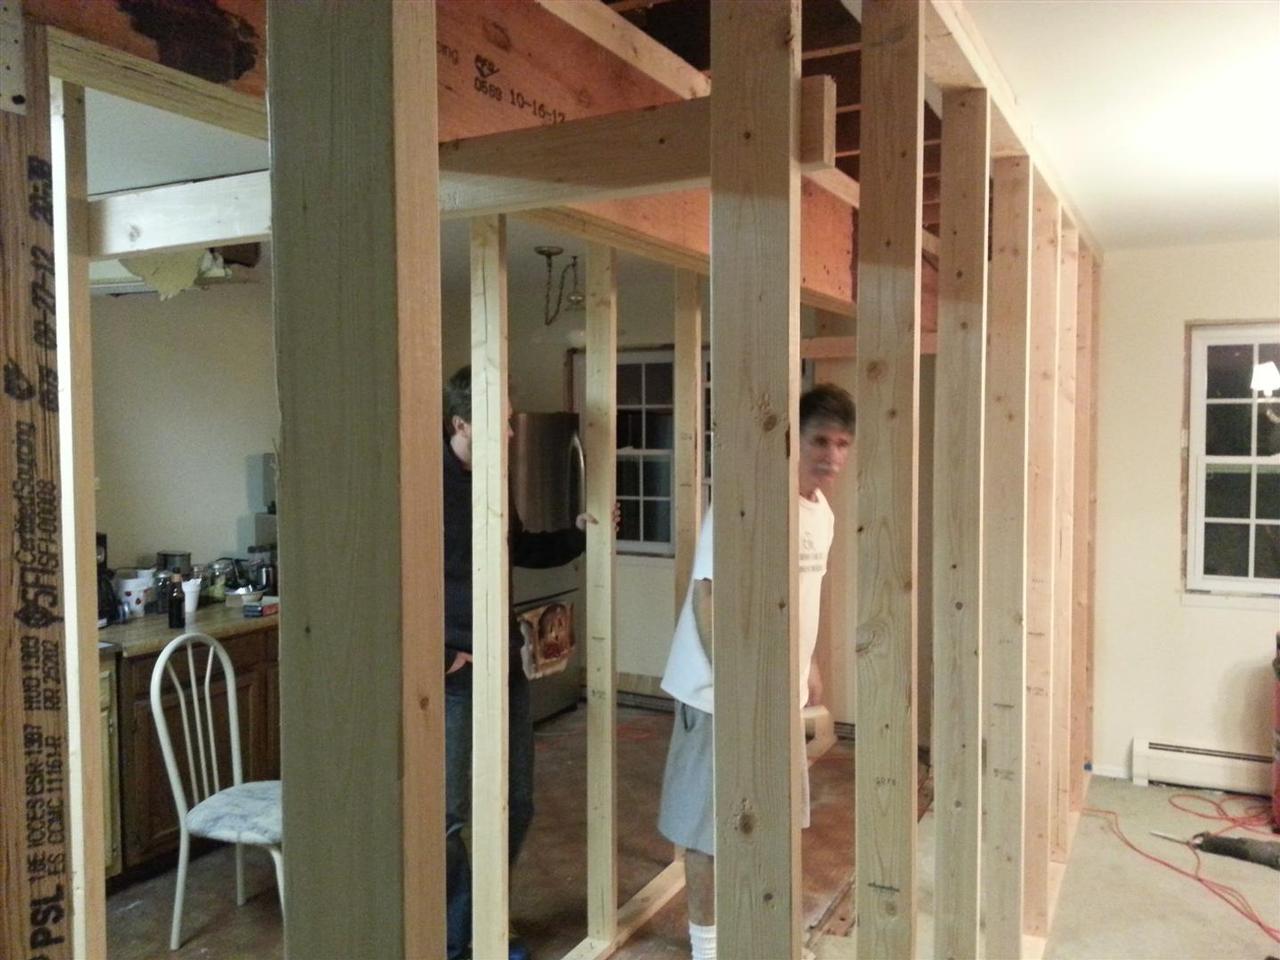
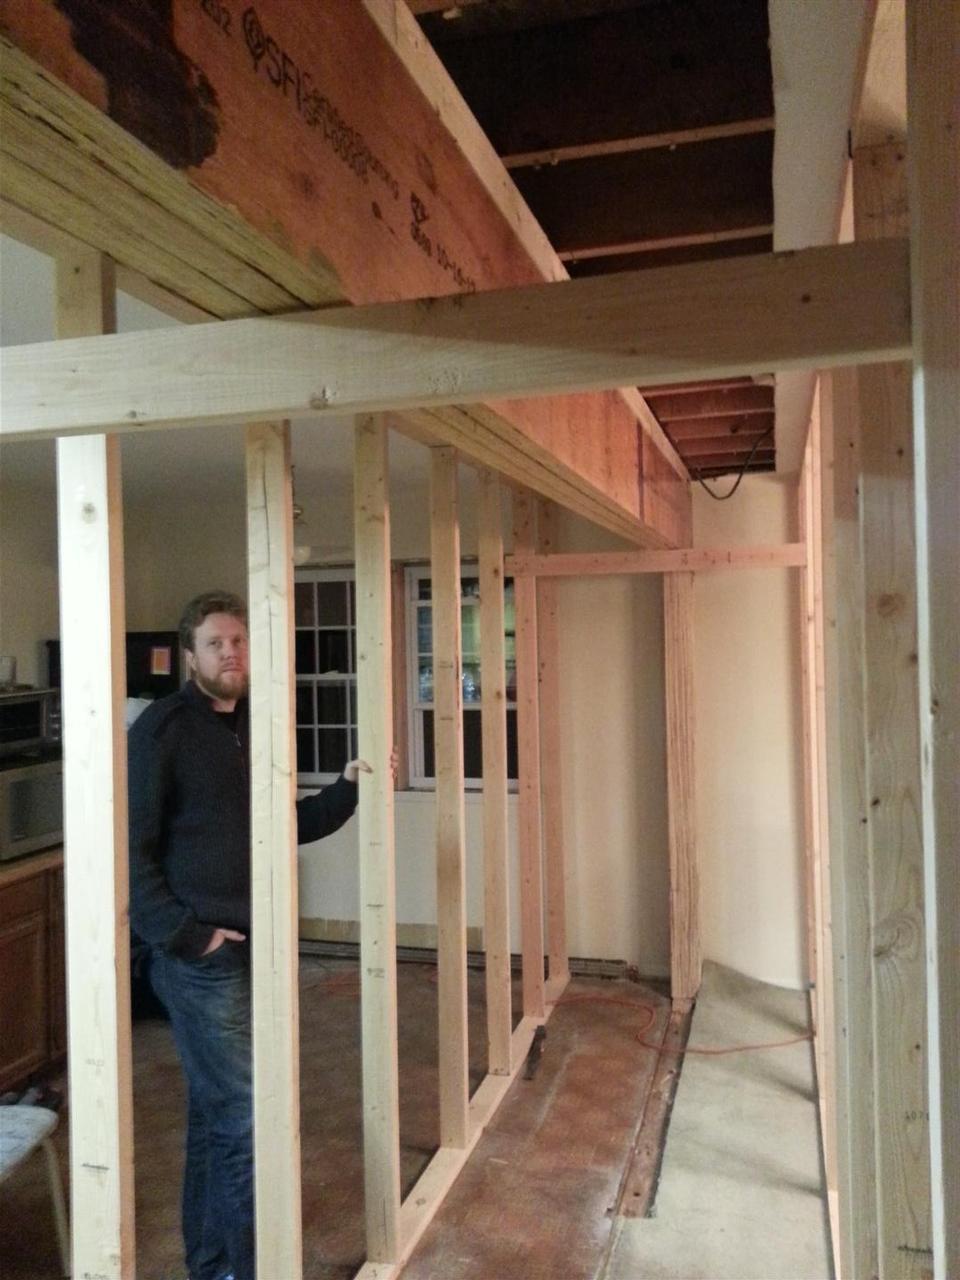
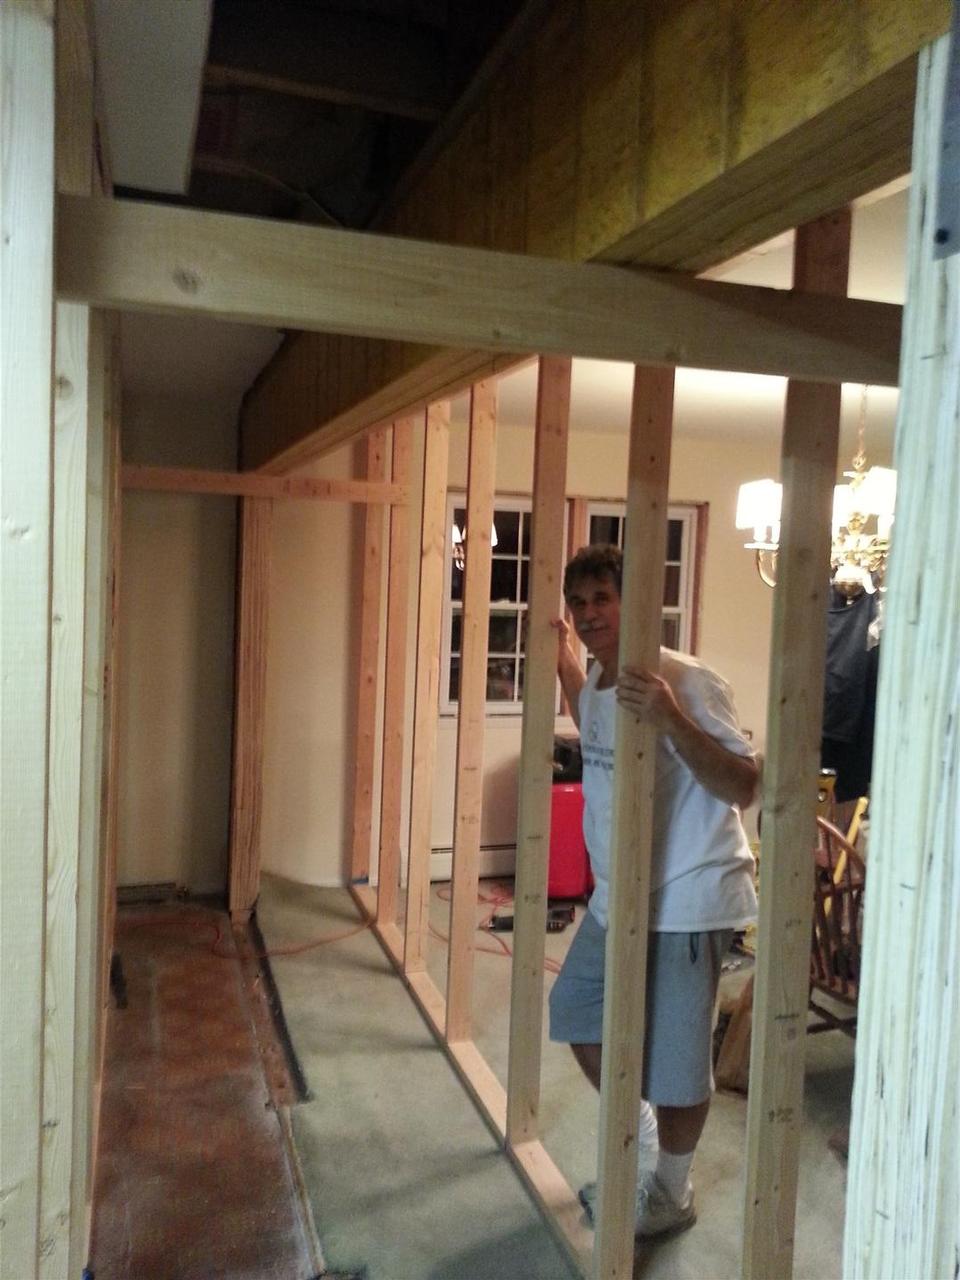
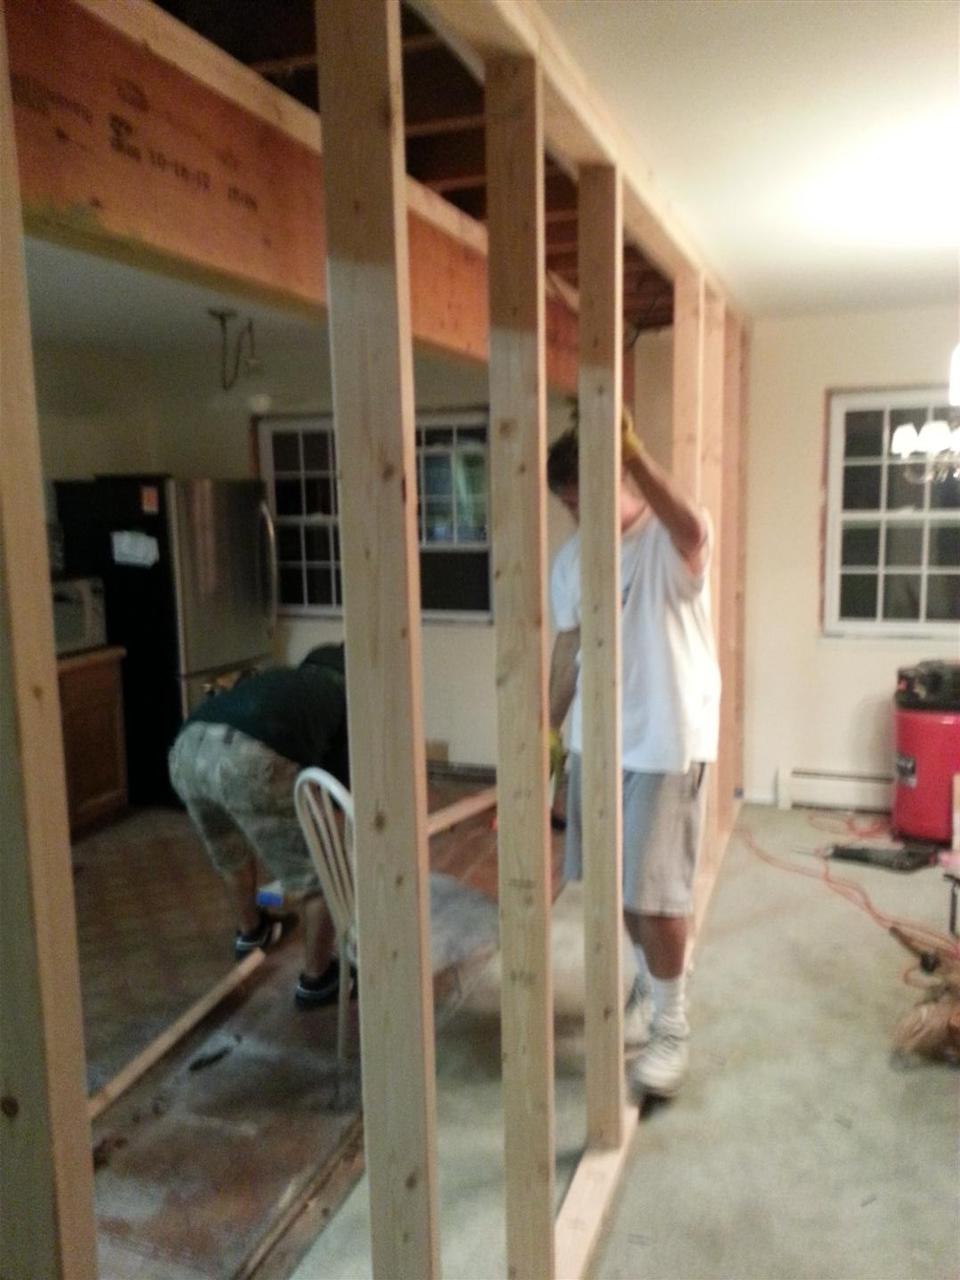
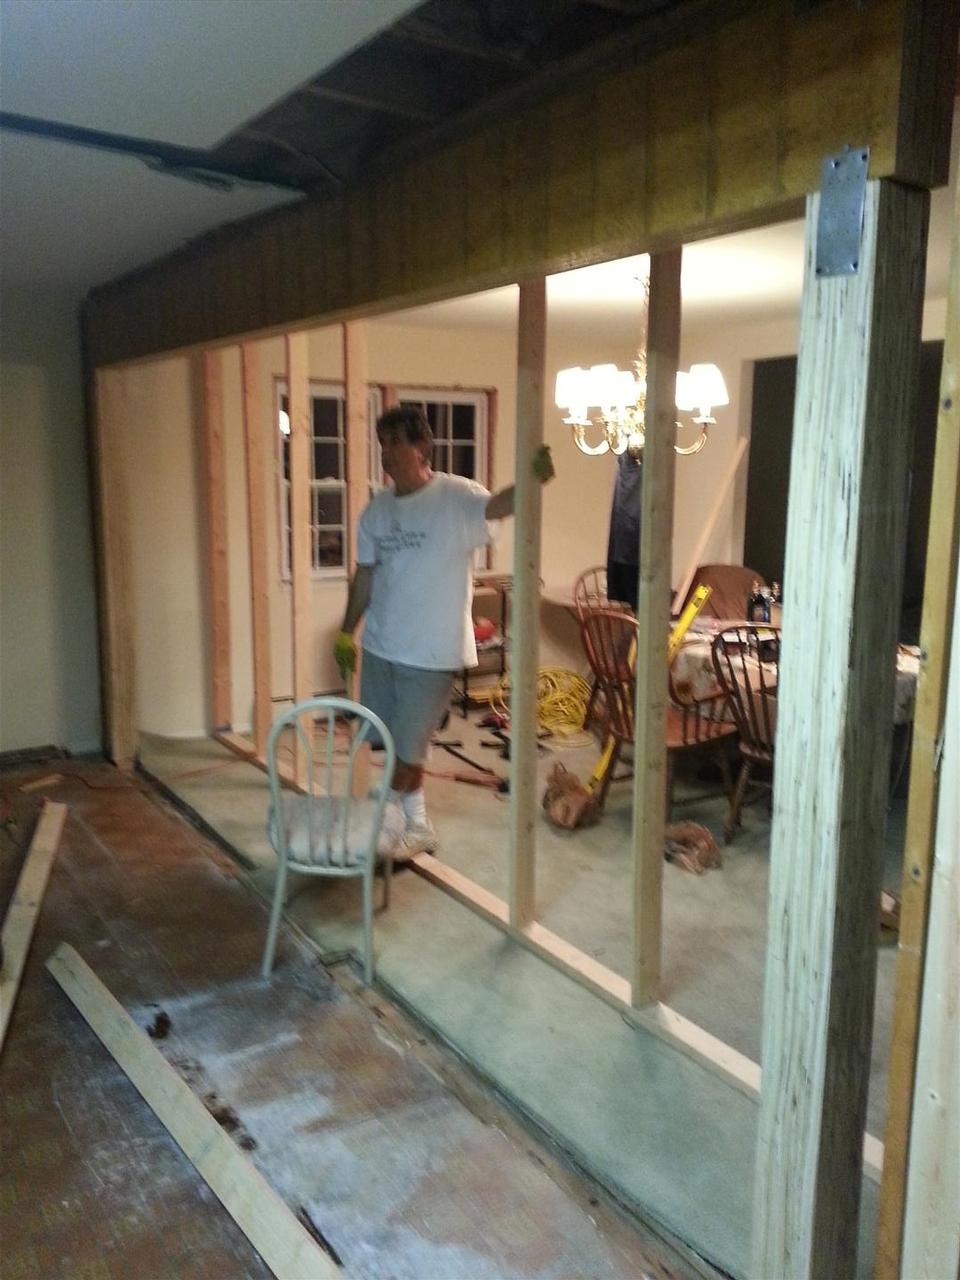
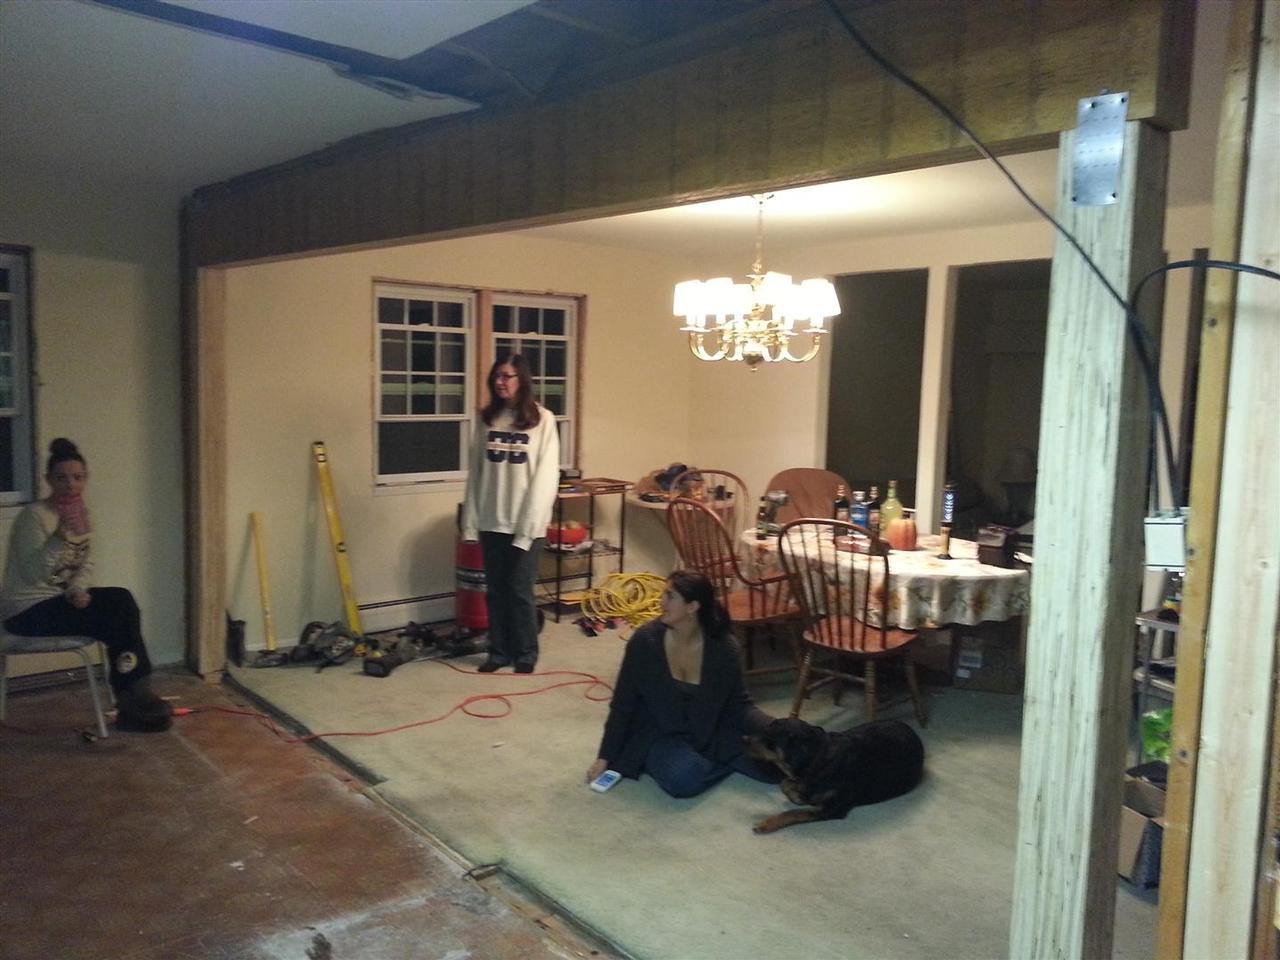
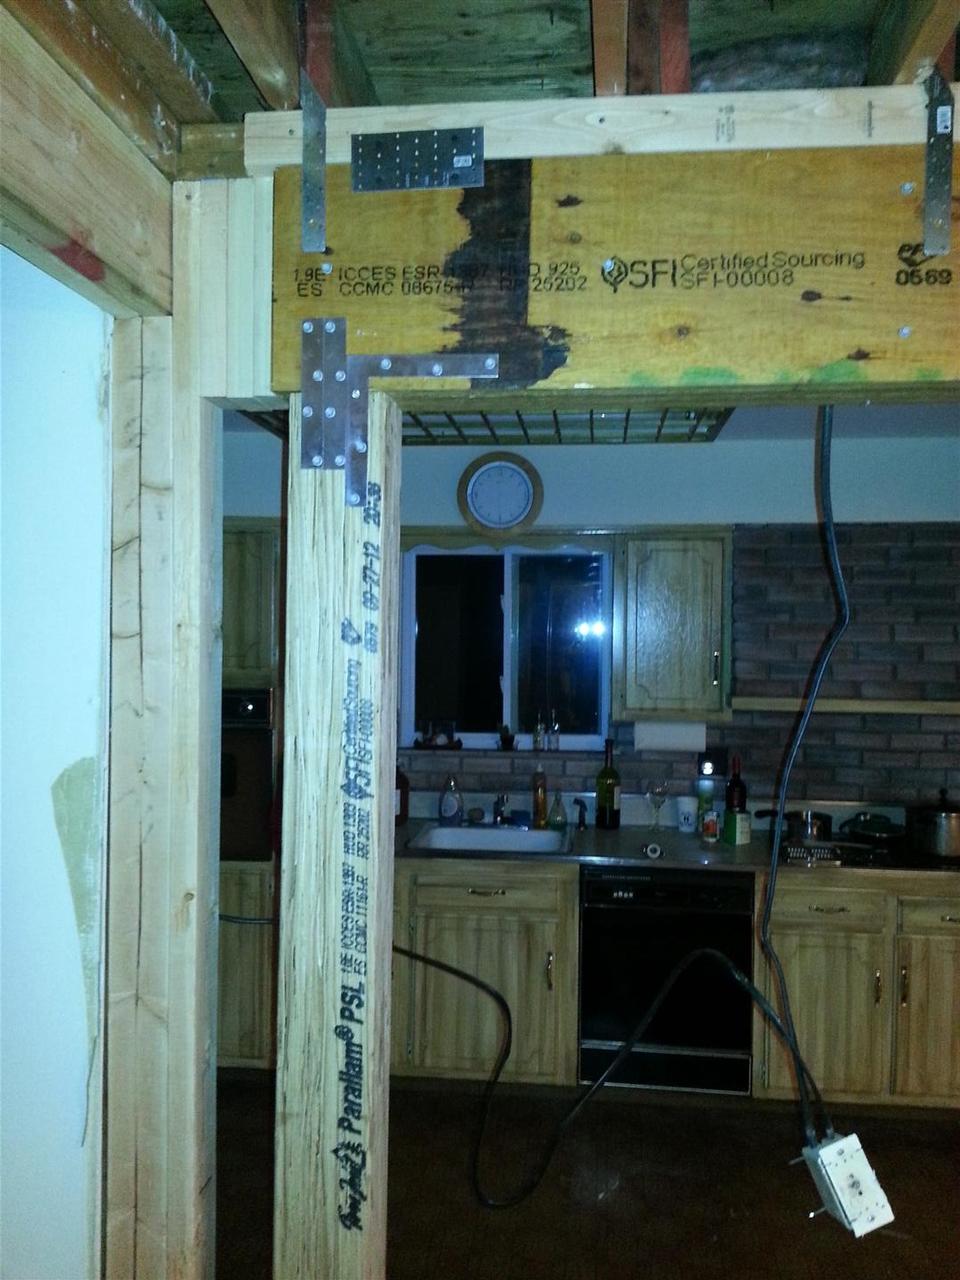
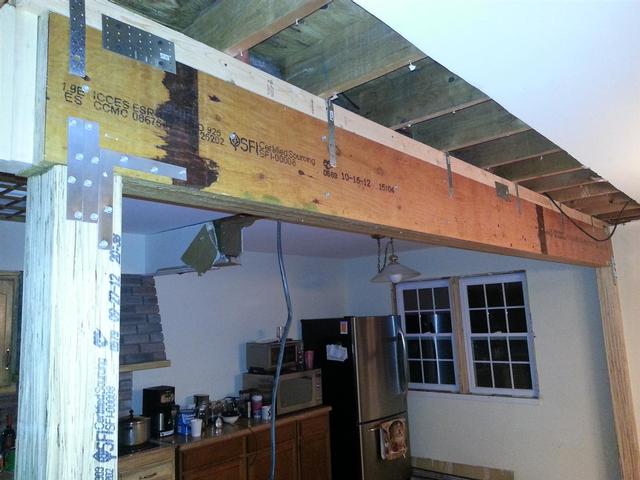
Even before Lauren and I had an accepted offer on the new house, we knew we would be tearing down the wall between the kitchen and the dining room. Unfortunately since this wall runs directly under the second story exterior wall. This means the wall carries all the weight of the second floor joists, kitchen ceiling joists, exterior walls and both first and second story roof load - making this wall extremely load bearing. With a span nearly 16 feet in length, this is not something you want to ballpark. An architect and family friend - appropriately named Bill Wall - was kind enough to work up a quick set of plans and spec the beam out for us.

87:  We started by snapping a line on the ceiling 16 inches away from the wall, and pulling back the drywall.

We started by snapping a line on the ceiling 16 inches away from the wall, and pulling back the drywall. (11/23/2012)

88:  Some of the sheetrock on the dining room wall had already been pulled down in order to move the copper pipe for the radiators as far towards the side as possible. It used to be located about 3 feet inward where the notch is in the top plate above the studs. Moving it towards the wall does put the pipe at greater risk for freezing in cold weather, but it's still on the hot side of the exterior wall, plus further insulated by an extra stud. I may even wrap the pipe in pipe insulation to help keep it from freezing once the sheetrock goes back up.

Some of the sheetrock on the dining room wall had already been pulled down in order to move the copper pipe for the radiators as far towards the side as possible. It used to be located about 3 feet inward where the notch is in the top plate above the studs. Moving it towards the wall does put the pipe at greater risk for freezing in cold weather, but it's still on the hot side of the exterior wall, plus further insulated by an extra stud. I may even wrap the pipe in pipe insulation to help keep it from freezing once the sheetrock goes back up. (11/23/2012)

89:  This is the kitchen side with the six linear feet of cabinet and countertop removed. The base cabinets are temporarily moved to the exterior kitchen wall. The uppers will be repurposed in the basement or the garage, if I can get them sturdy again. You can see the outline of the fridge and cabinets in the brick facade.

This is the kitchen side with the six linear feet of cabinet and countertop removed. The base cabinets are temporarily moved to the exterior kitchen wall. The uppers will be repurposed in the basement or the garage, if I can get them sturdy again. You can see the outline of the fridge and cabinets in the brick facade. (11/23/2012)

90:  My beautiful wife finally got to put her matching pink hoodie, pink workgloves and pink sledge hammer to the test.

My beautiful wife finally got to put her matching pink hoodie, pink workgloves and pink sledge hammer to the test. (11/23/2012)

91:  She doesn't know it yet, but hiding behind the debris in the wall is a veritable mouse graveyard.

She doesn't know it yet, but hiding behind the debris in the wall is a veritable mouse graveyard. (11/23/2012)

92:  Got one wall peeled back.

Got one wall peeled back. (11/23/2012)

93:  This place is quickly becoming a disaster area!

This place is quickly becoming a disaster area! (11/23/2012)

94:  Down to the studs. Loving the open concept.

Down to the studs. Loving the open concept. (11/24/2012)

95:  Now to bring some of the bulkier items outside.

Now to bring some of the bulkier items outside. (11/24/2012)

96:  That's it for our first day of demo.

That's it for our first day of demo. (11/24/2012)

97:  After speinding a couple of hours cleaning up the debris from the night before, my dad and I start screwing together the temporary walls to support the house while we remove the old wall and put in the beam.

After speinding a couple of hours cleaning up the debris from the night before, my dad and I start screwing together the temporary walls to support the house while we remove the old wall and put in the beam. (11/24/2012)

98:  We screwed in a single bottom sill plate, and two top plates 24 inches from the original wall, and tried to cut the studs just long enough to require some presuarion with a mallet to fit into place.

We screwed in a single bottom sill plate, and two top plates 24 inches from the original wall, and tried to cut the studs just long enough to require some presuarion with a mallet to fit into place. (11/24/2012)

99:  Since there are two new temporary walls, we spaced the studs 24 inches O/C rather than 16 inches just to speed things up a bit. It also makes it much easier to walk through to the other side.

Since there are two new temporary walls, we spaced the studs 24 inches O/C rather than 16 inches just to speed things up a bit. It also makes it much easier to walk through to the other side. (11/24/2012)

100:  I forgot to mention that I removed the outlets, and pulled the cables back down into the basement. We needed to connect the wires temporarily down there to power the fridge for the time being.

I forgot to mention that I removed the outlets, and pulled the cables back down into the basement. We needed to connect the wires temporarily down there to power the fridge for the time being. (11/24/2012)

101:  And the original wall is no more. We started cutting the outer studs with the sawzall as delicately as we could. We worked our way back to the two double studs that made up the old door between rooms. It took some psyching ourselves up, and devising a quick exit strategy to work up the courage to knock out those last two studs. Its pretty scary knowingly removing the only original means of support for untold thousands of pounds worth of house perched above you. The task is not for the faint of heart.

And the original wall is no more. We started cutting the outer studs with the sawzall as delicately as we could. We worked our way back to the two double studs that made up the old door between rooms. It took some psyching ourselves up, and devising a quick exit strategy to work up the courage to knock out those last two studs. Its pretty scary knowingly removing the only original means of support for untold thousands of pounds worth of house perched above you. The task is not for the faint of heart. (11/24/2012)

102:  The beam spec'd out was three plys of 1.75"

The beam spec'd out was three plys of 1.75" (11/24/2012)

103:  Same on this side. We also blocked in between floor joists in the basement, that way the posts are not above hollow or unsupported plywood. The 2x8 blocking makes a solid connection to the three 2x12 dimensional lumber beams in the basement.

Same on this side. We also blocked in between floor joists in the basement, that way the posts are not above hollow or unsupported plywood. The 2x8 blocking makes a solid connection to the three 2x12 dimensional lumber beams in the basement. (11/24/2012)

104:  We also had to rip down a 2x4 to widen up the top plate of the original wall. We put the extra meat on the side of the house that carries the second story - Same as the beams in the basement were. We made a cradle out of 2x4s to rest the 16 foot beam on top of. Then we shimmed it up against the existing top plate as tight as we could without risking the cradles failing.

We also had to rip down a 2x4 to widen up the top plate of the original wall. We put the extra meat on the side of the house that carries the second story - Same as the beams in the basement were. We made a cradle out of 2x4s to rest the 16 foot beam on top of. Then we shimmed it up against the existing top plate as tight as we could without risking the cradles failing. (11/24/2012)

105:  We noticed that the top plate was sagging nearly half an inch, despite our best efforts to build the temporary walls tight. We grabbed some plywood scraps and a small floor jack, and jacked up each side of the beam before measuring to cut the posts. Doing this took all but maybe 3/16 inch worth of sag out of the floor above.

We noticed that the top plate was sagging nearly half an inch, despite our best efforts to build the temporary walls tight. We grabbed some plywood scraps and a small floor jack, and jacked up each side of the beam before measuring to cut the posts. Doing this took all but maybe 3/16 inch worth of sag out of the floor above. (11/24/2012)

106:  With the posts tapped into position, and the pressure off the cradles, Dad looks much more relieved.

With the posts tapped into position, and the pressure off the cradles, Dad looks much more relieved. (11/24/2012)

107:  Down come the pemporary walls. This was the second most nerve racking event of the day. Will it hold? I think so. By the way, my Brother dave is presenting the part of his body for which he is most famous (or infamous) for.

Down come the pemporary walls. This was the second most nerve racking event of the day. Will it hold? I think so. By the way, my Brother dave is presenting the part of his body for which he is most famous (or infamous) for. (11/24/2012)

108:  This is probably the closest thing to a break my poor father took all day. Also, here you can see the MicroLam (LVL) beam which resembled plywood, and the Parallam posts which are made of laminated wood strands. Both are much stronger than their dimensional lumber counterparts.

This is probably the closest thing to a break my poor father took all day. Also, here you can see the MicroLam (LVL) beam which resembled plywood, and the Parallam posts which are made of laminated wood strands. Both are much stronger than their dimensional lumber counterparts. (11/24/2012)

109:  And finally family and friends can enjoy the newly opened space!

And finally family and friends can enjoy the newly opened space! (11/24/2012)

110:  The next day, we decided to replace an old stud in bad shape, and additionally stack a few 12"

The next day, we decided to replace an old stud in bad shape, and additionally stack a few 12" (11/25/2012)

111:  After another trip to the hardware store, I picked up some beefier brackets, and lag bolted them in. This beam isnt going anywhere.

After another trip to the hardware store, I picked up some beefier brackets, and lag bolted them in. This beam isnt going anywhere. (11/25/2012)

112:  I also found some very long hurricane ties that will reach from the beam, past the top plates, and into the floor joists above.

I also found some very long hurricane ties that will reach from the beam, past the top plates, and into the floor joists above. (11/25/2012)

113:  I had to cut a little off the end of the 2x3 used to widen the top plate in order to route the romex to the light switches. With the parallam beam being 5 1/4 wide, you can mount two work boxes back to back to service both rooms.

I had to cut a little off the end of the 2x3 used to widen the top plate in order to route the romex to the light switches. With the parallam beam being 5 1/4 wide, you can mount two work boxes back to back to service both rooms. (11/25/2012)

114:  The hurricane ties are actually a little too long and had to be bent upwards. The brackets are certainly holding everything toegther nicely though.

The hurricane ties are actually a little too long and had to be bent upwards. The brackets are certainly holding everything toegther nicely though. (11/25/2012)

115:  I put the long hurrican ties every other floor joist, while the others will get the smaller hurricane ties. We added a ton of lag bolts throughout the beam. Nearly a hundred were used so far. Looking from a shallow angle, if tis beam deflects 1/8 inch in the middle, its a lot. Its very strong and easily holds the weight of the structure above.

I put the long hurrican ties every other floor joist, while the others will get the smaller hurricane ties. We added a ton of lag bolts throughout the beam. Nearly a hundred were used so far. Looking from a shallow angle, if tis beam deflects 1/8 inch in the middle, its a lot. Its very strong and easily holds the weight of the structure above. (11/25/2012)

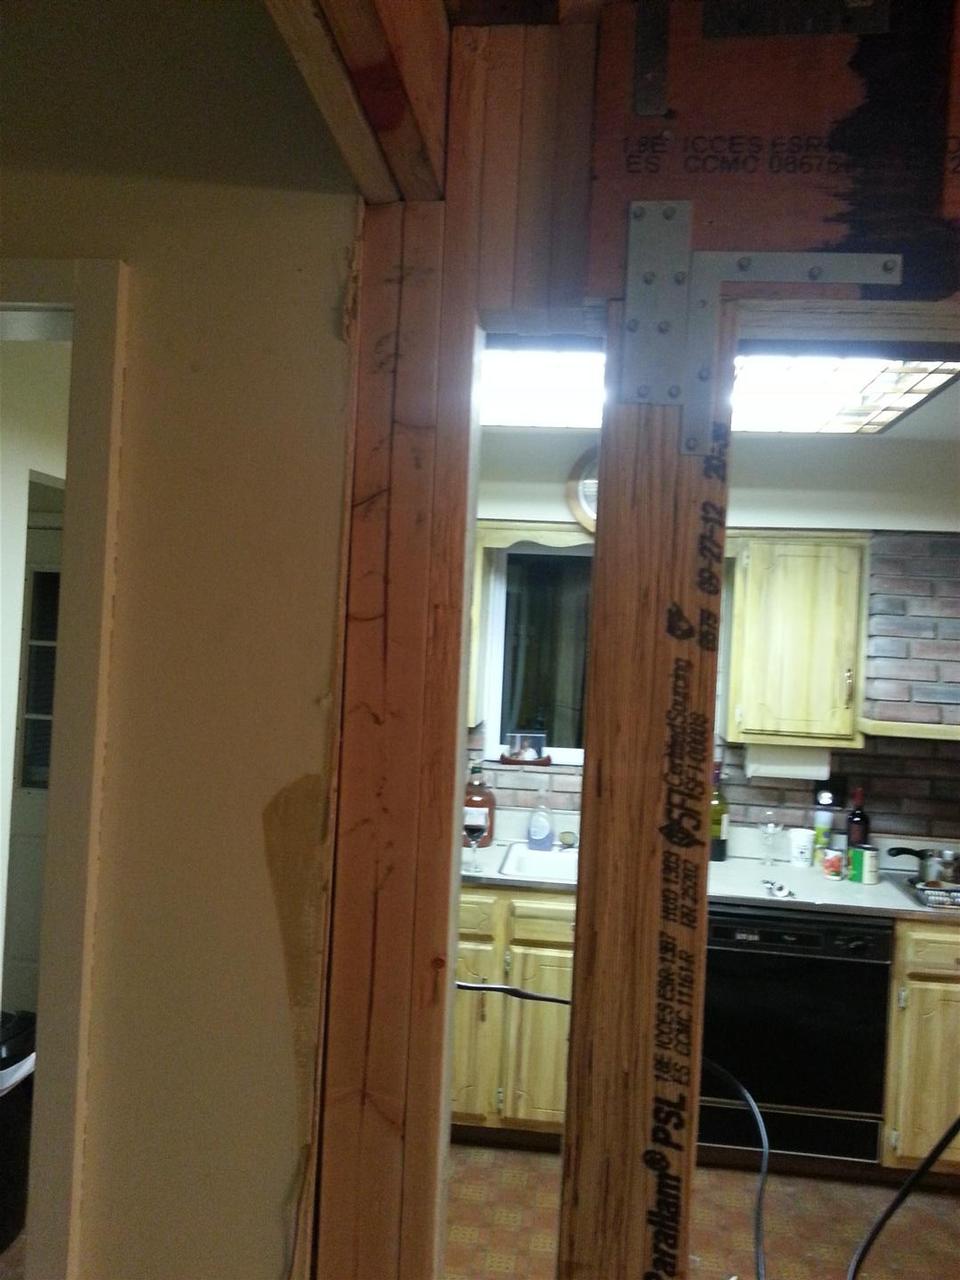
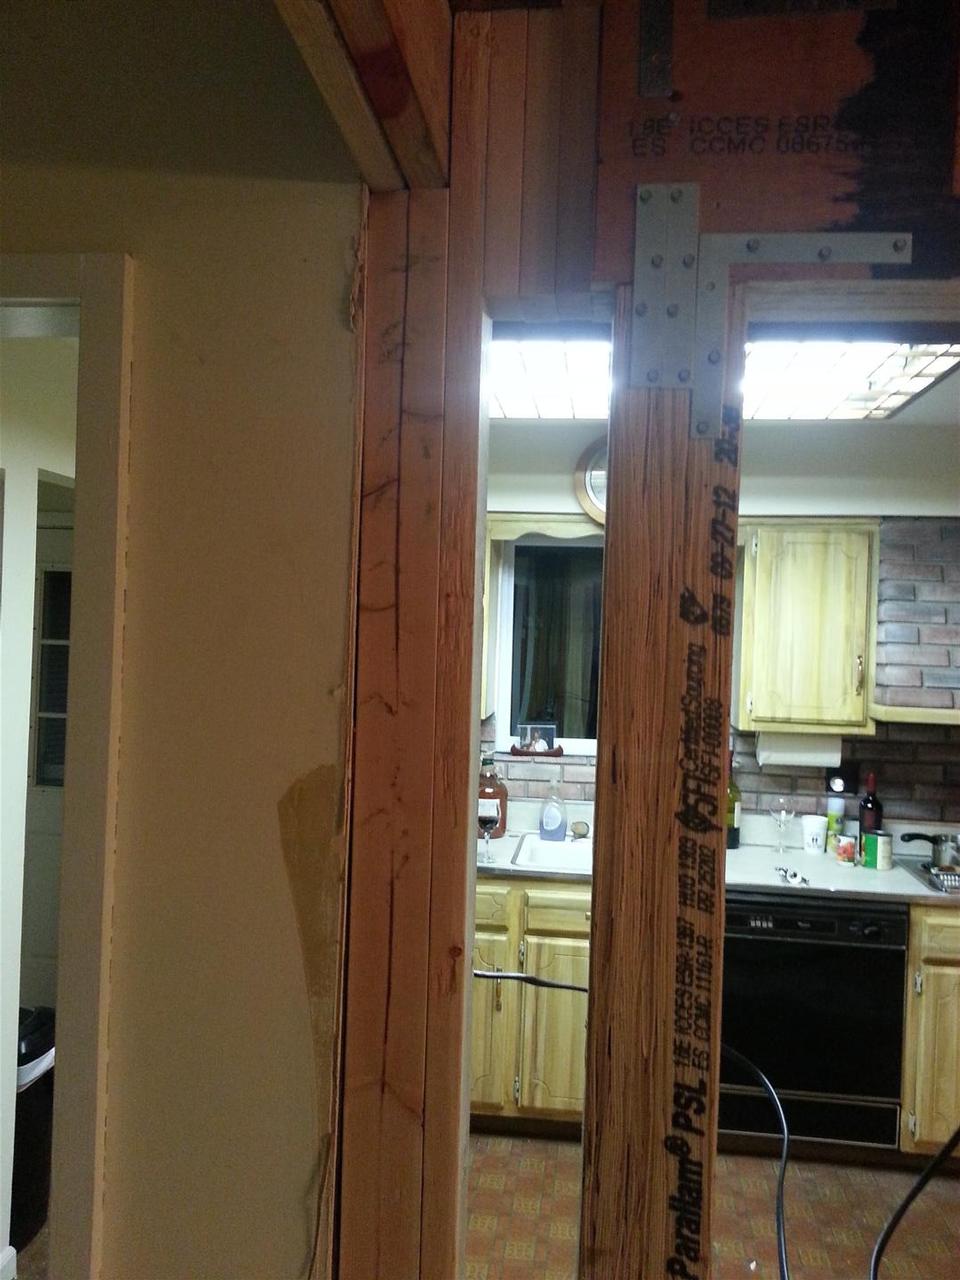
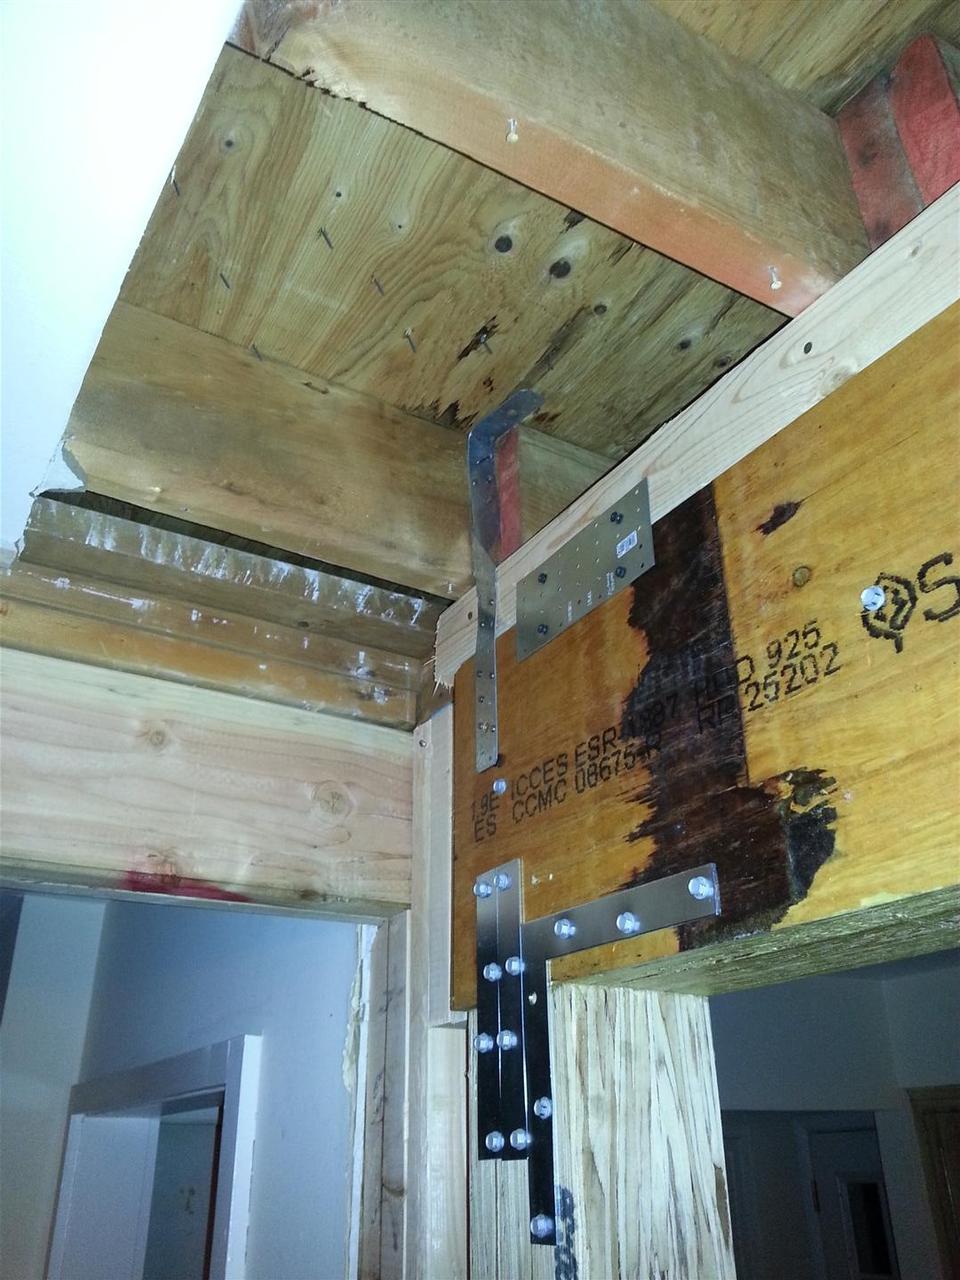
We still need to add some blocking in between the floor joists above to keep any joists from rolling, and Ill be adding quite a bit more steel plating just to ensure that when the bulldozers finally come for this house, this beam will give them the most trouble.

Thank you to all my friends and family who came to support us. Thank you to my wife who owned demo and cleanup detail. Thank you to my brothers Dave and Danny, friends Sean and Danielle who all helped with the heavy lifting. A huge thank you to my parents who made the trip down to help, my mom who incessantly cleaned and made sure we were always well fed, and my dad who busted his ass for a few days straight. He put my stamina to shame, thats for sure. Thank you to Eric at Riverhead building for hooking me up with the materials, and Thank you to Architect Bill Wall, a true gentleman and all around great guy.

we love to get feedback, so here's your chance to tell us just how bad we did. chances are we already know just how bad it really is...

your name
your email
(only if you want a scathing response)
what's a matta'?
bad feedback
what's my name?
(Spam Control)

some insensitive jerkwads have said: